Showing posts with label repair work. Show all posts

Transform fashion: Chanel Cut Out Gloves tutorial

Things you need for this DIY:
*unlined vintage leather gloves
*scissors
*an X-acto knife
*hot glue gun
*two pieces of card board or heavy cardstock, one cut to fit inside the palm of the glove and one cut to fit inside a finger of the glove

Total time:
1.5 hours

Total cost:
nothing if you snag a pair from your grandma!

chanel cut out gloves diy
I have kinda stubby hands so I've learned that when gloves are too big for me, the easiest thing to do is cut off the fingers. I recently got a large collection of gloves that once belonged to Rubin's grandmother. Most of them fit me perfectly but a few pairs were a bit to big. They looked like they had never been used so I guess they were too big for her too. I saw these cut out gloves in the Chanel spring 2001 rtw show and became immediately obsessed. I finally got around to making my own.


First I turned the gloves inside out and marked with a pencil where to cut the bottom off, leaving a quarter inch seam allowance. You can kinda see.


Then I chopped em and hot glued the edge over.


Glued vs. unglued.


I chopped off the fingers without measuring but I put them on before I glued the edges to make sure I had cut enough off. You wanna leave yourself about an 8th of an inch extra.

I glued the finger edges in four steps to make it easier; front, back, side, side.

I took the pieces of cardstock and stuck them in the glove. They served as drawing and cutting surfaces.

I used pencil to draw rectangles on the back of the glove.


Here's the tedious part, cutting the rectangles out with my knife.

When I was done and turned them right side out and was good to go.
chanel cut out gloves diy
Enjoy!
Read more: http://semijewels.blogspot.com/2011/03/diy-chanel-cut-out-gloves.html

Crafts for beach: Ribbon Flip Flops tutorial

  
  Crafts for beach: Ribbon Flip Flops tutorial
What you need:
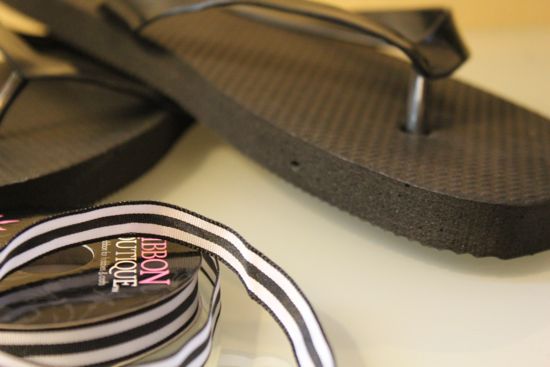
  • Pair of flip flops
  • Length of ribbon cut into four 18 inch pieces
  • Some sort of craft knife
Step 1: Measure 1/4 inch from the top of the strap (the part that goes between your first two toes). Cut a vertical slit on each side.
CAUTION: This is hard. First, my straps must have been made from industrial plastic or something because I had to saw to cut it. Second, while you’re sawing away, it’s easy to get carried away and slice all the way through the strap. This pretty much ruins the project … and your flip flops. Third, try to not lose a finger.
Step 2: Measure 3/4 inch from the first cut and continue making vertical slits down each side. Make sure you have an odd number of slits. I cut 7 on each side.
Step 3: Cut four 18 inch pieces of ribbon.
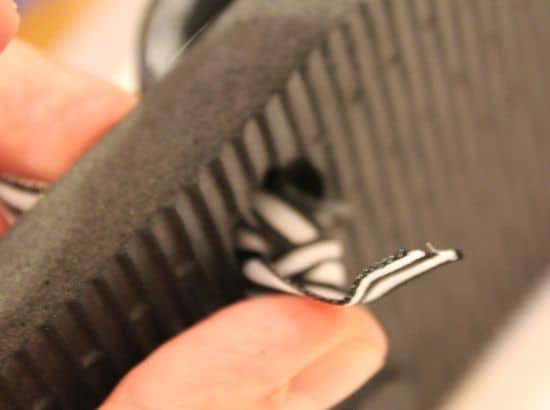
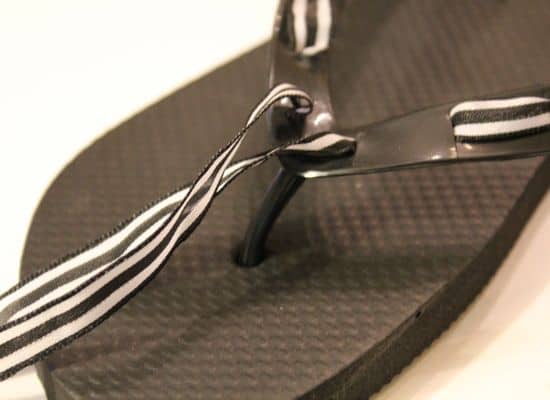
Step 4: Pull apart the bottom of the flip flop and thread the ribbon up through. Leave about 2 inches on the bottom of the shoe. Wrap it around the strap button and push the button back in.
Step 5: Weave the ribbon through the holes until you reach the top. Tie the ends into a bow and trim off the excess ribbon.
I shouldn’t post this photo, my pedicure looks so bad. I’m going tomorrow. I promise.
Source: henryhappened.com

Recycling ideas: Wreath for holiday tutorial

Wreath 
Sewing patterns
Plushy wreath
Supplies:
- 1 knit sweater or Tshirt (I used a waffle striped T.)
- 1 wreath form (You can find junky old wreaths at the thrift store and strip them for your purposes.)
- A bunch of batting (I gutted an old ugly pillow I had.)
- Fabric flowers, buttons, or anything pretty you have laying around the house

Tools:
- Pinking sheers
- Thread
- Needle
Wreath-2
Step One:
Cut the arms and side off of the shirt so that you have two even strips of fabric.  One from the front, and one from the back of the shirt.  The width of your strips will depend on how fat you want your wreath to be in the end.
Wreath-3
Step Two:
Stitch your fabric together at the ends so that it is one long strip.  I found that one shirt was long enough to wrap an entire wreath after the length was doubled by stitching the two lengths together.  The nice thing about knit fabric is that it will stretch.  This helps limit the lumpiness of the wreath in the end.
Wreath-4
Step Three:
Surround a small portion of your foam wreath form with batting.  Then, begin stitching the fabric closed around the batting and the foam.  This is a long and tedious process, but it's worth the effort!

Wreath-5
Wreath-6
As you continue along the wreath, add more stuffing to the areas that have been stitched.  The more stuffing you add, the less lumpy your wreath will be.
Wreath-7
Step Four:
When you come to the end of the wreath, close the ends the same way you closed the entire length of the fabric.  But be sure to leave an opening long enough to add the last bit of stuffing to even out the wreath. Then, when you're done stuffing it, completely close opening.
Wreath-8
If your hands are anything like mine, your fingers will be a bit soar by this point!  But you still have work to do.  Your wreath is probably very lumpy.  But it's okay, because the next few minutes or so will be spent massaging the lumps out of the wreath.  It helps to have knit fabric that will move about with your fingers so you can maneuver the batting more easily.
Wreath-9
Step Five:
Now delve into your collection of pretty things and stitch or glue them onto your finished plush wreath.  I actually didn't stitch or glue my items.  I used straight pins, so that I can easily remove them and repurpose everything after the season is over. 

Step Six:
Use leftover fabric or a piece of ribbon to hang your wreath.  You can use any method to attach it to the back of your wreath:  stitching, staples, pins… whatever holds it in place.  Unless you're hanging the wreath on a glass door, nobody will see the back.  Once it's hung, massage the last few lumps from the wreath, and step back to enjoy what you've created!
Wreath
This is the first time I've ever made a plush wreath. During this process, I discovered a few things I will do differently next time.
Next time I will cut the knit fabric a bit smaller than it needs to be.  When it stretches out, I think it will help smooth out the lumps.  The second thing I will do differently is before wrapping the batting and fabric around the wreath, I will sew a loose stitch along the length of the fabric.  Then, after the wreath is wrapped, I will pull the threads of the loose stitch to gather the center of the wreath.  I think this will accomplish a more even gathering of the stripes at the center, and a more tailored look to the entire wreath.

This wreath was definitely a learning experience for me, and I hope you've been inspired by the process!  If you've made any holiday wreaths recently, be sure to link them up in the comments section so that all of us can see!
Wreath2

http://racheldenbow.blogspot.com

Crafts for summer: refashion tutorial


nico nico cloud t and cutoffs

I know this is not re-inventing the wheel here but I was inspired to cut off these crazy bell bottom jeans that I got for my son (okay this was years and years ago so don't shoot me) but we cut them off for Franny and they looked great... Just thought this might inspire you too! have fun with old stuff... we do it all the time!

here's the how to (but you know how to do this.... maybe you just forgot!?)


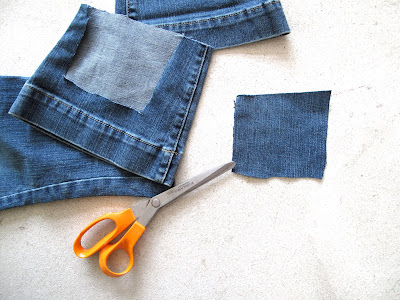
cut off one leg where you think it will look nice


fold that leg over and cut the other leg at the same point


these extra pieces make great knee patches!

HAPPY SUMMER!
Source: nonchalantmom.blogspot.com