Showing posts with label Pillows. Show all posts

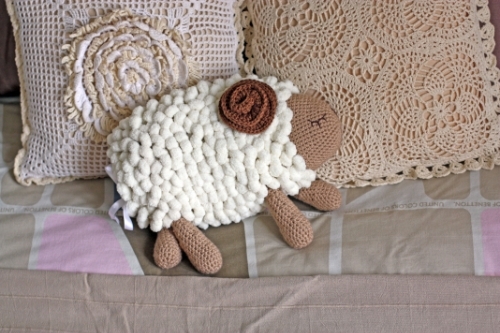
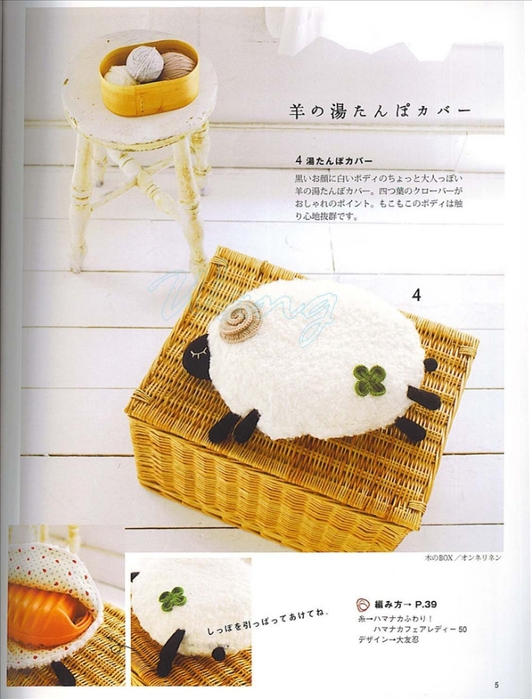
Gift presents for kids: Crocheted pretty lamb.

Gift presents for kids: Crocheted pretty lamb.

1.
80 (500x333, 128Kb)

2.
81 (500x333, 153Kb)

1.
82 (500x333, 121Kb)

2.
83 (532x700, 244Kb)

3.
84 (519x700, 158Kb)

4.
85 (522x700, 184Kb)

5.
86 (514x700, 157Kb)

Tiger face, fur, footprint, Knitting, embroidery patterns

Tiger face, fur, footprint, Knitting, embroidery patterns


Sewing patterns: Pretty, Pleated Pillow tutorial


Sewing patterns: Pretty, Pleated Pillow tutorial

A pretty, pleated pillow. Now, if you are a sewing perfectionist, I implore you to stop reading at this point. But if you believe that imperfections only make things better, I have a little tutorial for you. (And if you're neutral on the whole imperfections issue, you'll probably like the tutorial as well.)


What you'll need:
  • Fabric (about 1/2 yard)
  • A pillow form or polyfil...I usually like to stuff my pillows with polyfil, but in this case, I had an existing pillow that I was recovering, and it had an insert, so that's what I used.
  • 2 1/2" wired ribbon
  • Matching thread
  • Pins
  • Measuring tape
Instructions:
1. Start by cutting two squares of fabric about 1/2" larger all the way around than your pillow form. (In this case I was using a 14" pillow form, so I cut 15" squares)

2. Cut 5 lengths of ribbon approximately twice as long as the squares you just cut. I usually add another inch or two for good measure.


3. Pick the square that you would like to be the front of the pillow and measure one side (this will be the top of your pillow) to find the center. Pin the top of one piece of the ribbon in it's center at the center point of the pillow front.
4. Working from the center, pin each additional piece at the top, so that each piece is parallel with the piece next to it. (You will notice in the photo, that there are pins running parallel to one of the edge pieces. I use these as a guide on the first piece that I sew to make sure that I keep it straight. After the first piece is sewn, I then use it as a guide for the second piece, and so on.)


5. Begin sewing one of the edge pieces. Approximately every 2" fold the piece back on itself about 1/2" to create a pleat. Then continue sewing right over the pleat you've created. Continue to do this for the entire length of the ribbon. This is where being a perfectionist is discouraged. (Well, impossible, in my case.) I simply eyeball these pleats. They are by no means perfect. But once you get the hang of it, you can eyeball it pretty easily.


6. Continue this same process with each ribbon. The pleats do not need to line up with the pleats in the previous piece. In fact, the overall piece will look better if the pleats do not line up. (Trust me on this.)


7. Once you have finished sewing all the ribbon. Pin the right sides of both fabric pieces together and sew, leaving a 1/2" seam allowance. Make sure to leave one side about half way open so that you can slip your pillow form in.


8. Trim the edges, clip the corners and then turn the pillow right side out. Put the pillow form in the pillow and close with an invisible hand stitch.
That's it!
Here's the pillow on the Princess' bed...just the right touch!


Crafts for home decor: How to Pintuck

Pintucks are a great way to add visual interest and texture to your space. These sewn tucks can be used to add a bit more glam to bags, pillows, clothing, and linens!


Crafts for home decor: How to Pintuck

Be sure to pintuck your fabric before cutting your pattern piece. 

 To begin, gather all of your MATERIALS:

1} Fabric cut to size. I used 100% cotton and began with a 8 inch x 45 inch strip. The final width after pleating is 2.5 inches. Be sure to allow extra fabric to pleat.

2} Ruler / fabric pencil or chalk {optional}

3} Sewing machine and matching thread

4} Iron


I am sharing two methods for pintucking. The first is very concise, but I had trouble getting my pleats even. The second method is more freehand and gives control to vary pintuck width as desired.


FIRST METHOD
Mark lines using a ruler on the right side of the fabric as a guide. Width between lines should be double the desired width of the pintuck. Here I marked 1/2" lines for a finished tuck of 1/4".


Fold fabric {with wrong sides together} matching the first two marked lines. Pin or iron.


Straight stitch along the marked line.


For the next tuck, match the third and fourth lines and pin wrong sides together. Stitch. Repeat this method until all pintucks are made. Finally, iron pleats to one side.

PINTUCKS USING FIRST METHOD


SECOND METHOD
Tucks can be sewn using your presser foot as a guide rather than marking lines on the fabric. I felt my tucks were more concise using this method.

To make your first tuck, start by folding your fabric {wrong sides together} near one edge. Stitch together using a 1/4" seam allowance.

For the following tucks, fold fabric to make 1/2" fold from your previous line of stitching. Then stitch another tuck using 1/4" seam allowance from folded edge.


Continue this method for all pintucks. Lastly, iron all tucks in one direction.

PINTUCKS USING SECOND METHOD


You can now add your pintucking to any project or pattern.

Crafts for home: Granny-Chic Pillow DIY


Pillow11  
Sewing and crochet patterns
Pillow1
Supplies:
good sized vintage crocheted doily
vintage pillowcase/sheet (or other cotton material)
grosgrain or satin ribbon
light/medium weight fusible interfacing
fiber-fill/stuffing

Pillow2
Fold your material so you have a double layer and can cut both the front and back of the pillow at the same time. Smooth your doily on top to use as a template, and cut around it leaving approximately 1.5-2" allowance.

Pillow3
Fold your interfacing in the same manner and use your material as a template to cut two pieces.

Pillow4
Fuse interfacing to the back of each of the fabric circles using the manufacturers directions (remember, the side with the bumps/dots does down!).

Pillow5
Pin the doily to one of the circles and stitch it down along the outer edge using coordinating thread.

Pillow6
Pin the two circles together, right sides facing. I like to add one horizontal pin, as shown, to remind myself to leave that section unstitched. Sew the two pieces together.

Pillow7
Snip notches along the seam allowance, as shown, to create a smoother curve along the outside of the pillow. Be sure not to cut too close to your stitch line!

Pillow8
Turn right-side out and press flat. If you press the opening flat at this stage, it makes it much easier to stitch closed later. Stuff pillow with poly-fill.

Pillow9
Stitch the opening closed. You can top-stitch it on your machine, as I have done here. Or, you can hand-stitch it closed for a more invisible seam.

Pillow10
Weave ribbon through the openings of the doily, and tie in a bow.

Pillow11
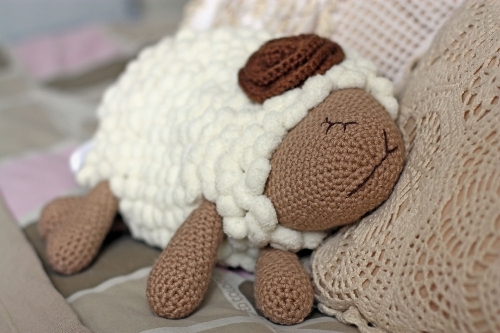
Ta-da! Just like that you have a sweet granny-chic pillow that took less time to make than it would to find at the thrift store (bonus: it doesn't smell funny, either).
Source: http://abeautifulmess.typepad.com