super cute fall wreath:

Supplies Needed:
- Wreath form
- Raffia (I actually had it leftover from a Halloween costume I made for my husband that may have involved wearing thermal underwear as pants…that’s true love)
- Burgandy, orange, and yellow felt
- Burgandy, orange, and yellow embroidery felt
- One or two matching buttons

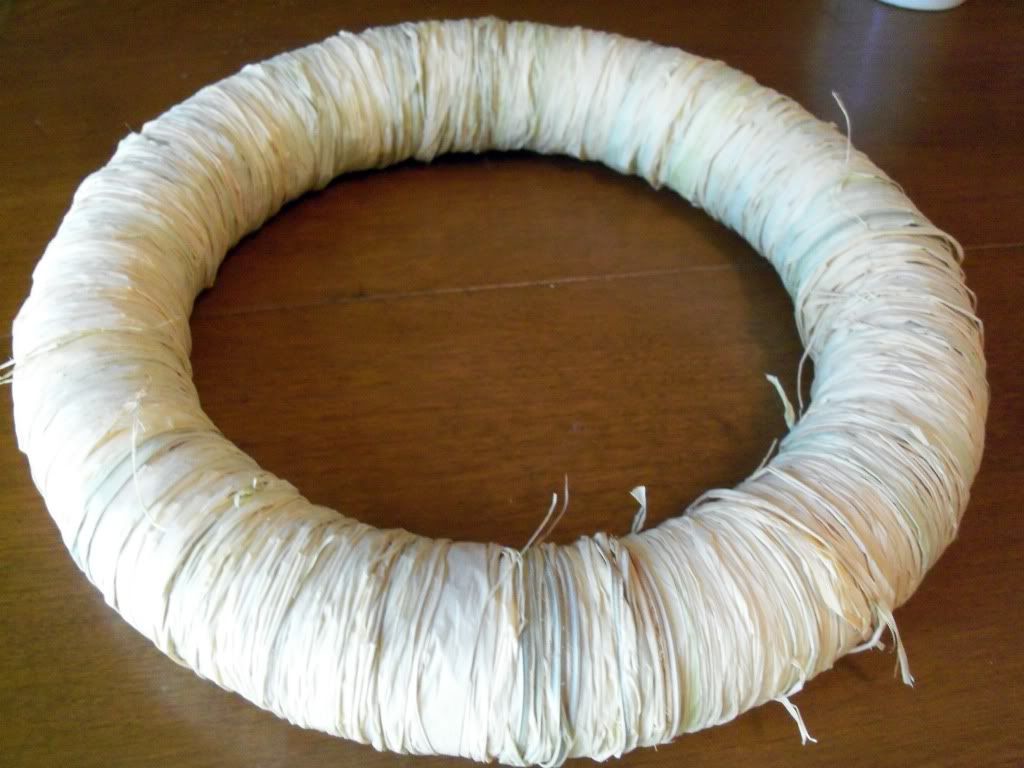
Step 1: Ok so I live in Texas. It’s still 100 degrees here. But I had to have some sort of fall decoration. I think I’m just trying to trick myself into thinking it’s actually cooler outside. My husband even had soup for lunch the other day. Anyway, so grab your raffia and wreath form. Pull a strand from the raffia and wrap it around the form closely together so you can’t see the Styrofoam underneath. I just wrapped around the end of the strand so that it would stay in place. Continue grabbing more strands and wrapping until the wreath is covered. I just sat and watch my daughter paint while I did this.
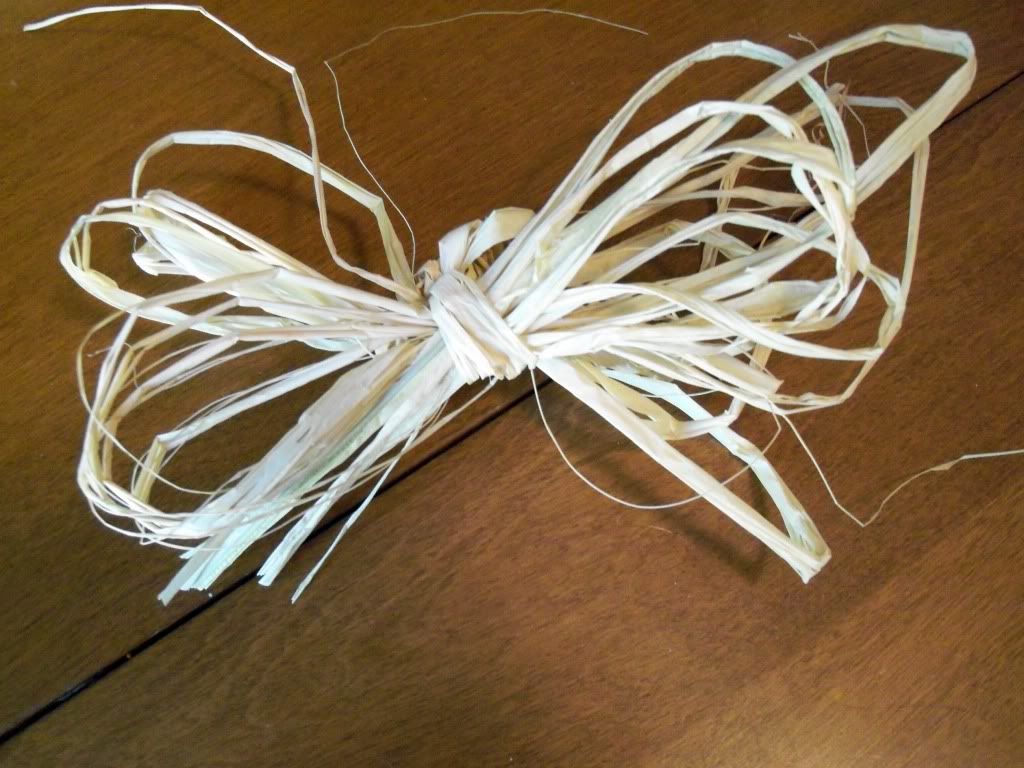
Step 2: Using 3 or 4 strands of raffia tie a bow. The strands I had were pretty long so I tied a double bow. Set aside.
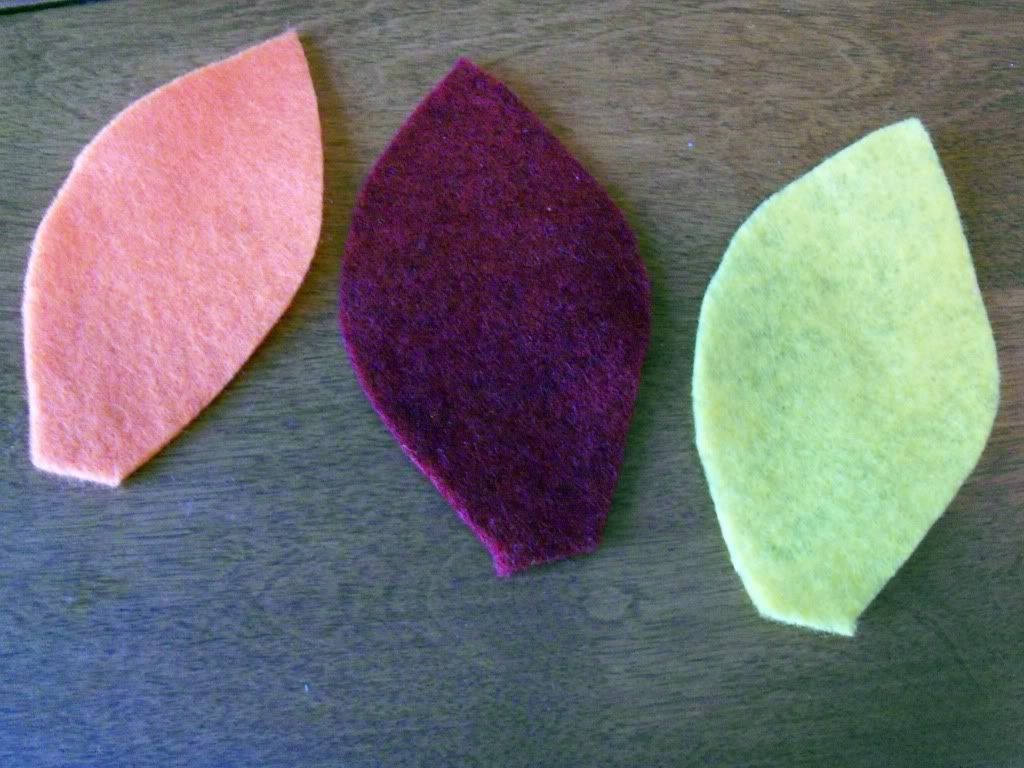
Step 3: Out of your three pieces of felt cut three leaves. My leaves were about 3” long. I cut the first and then used it as a template for the other two so they were the same size and shape.
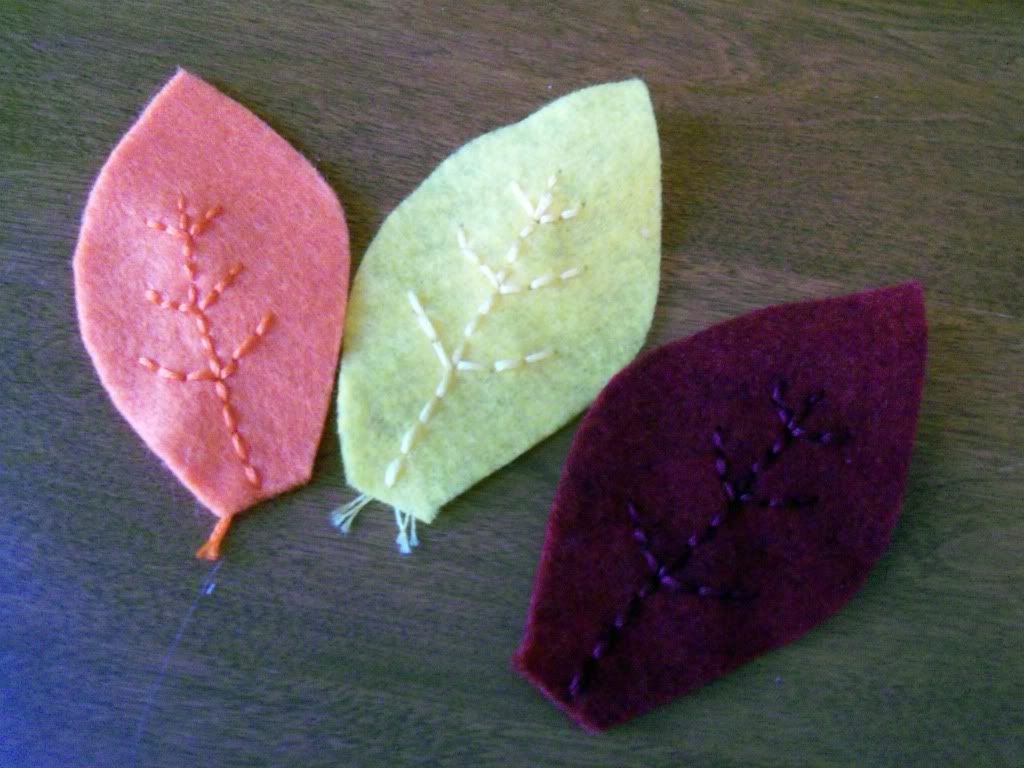
Step 4: Taking each of the leaves and it’s corresponding floss, embroider the veins into the leaves. I used a simple backstitch (forward on the back, backwards on the front…does that makes sense?). I just free handed it, though you could definitely draw them ahead of time. Repeat for all three leaves.
 Step 5: Assembly time! I chose to put my raffia bow off to the side a little, though I’m sure it would look cute wherever. Glue the bow down first. Follow this with the three leaves. I put them together how I wanted them to look and then hot glued them to the bow. Finish it up with a button to cover the leaf bottoms. I used two buttons, but I’m sure one would do the trick. I finished it off with a thick piece of raffia on the back of the top to help it hang.